


Heavy-Duty Arch Fenders for Harsh Environments
07/09/2025Tips for Choosing Marine Fenders
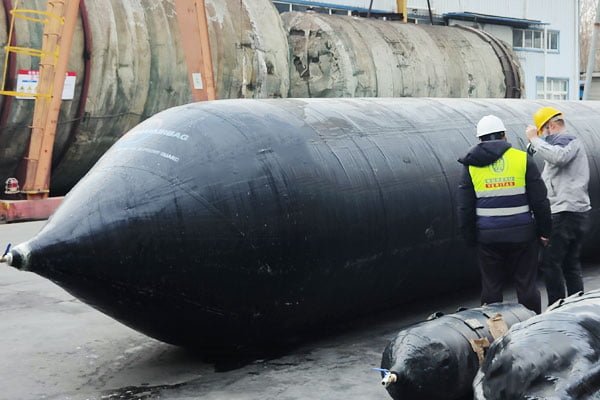
07/10/2025Key points of Ship Launching airbags repair operation steps
Ship launching airbags play a critical role in launching, docking, lifting, and salvaging vessels. However, these rubber-based structures may suffer damage due to sharp objects, overuse, or aging. Proper repair procedures are vital to restore the airbag’s strength and ensure safe use. This article outlines the key steps and precautions for repairing ship launching airbags.

1. Preparation Before Ship Launching Airbags Repair
Clean the Airbag Surface
Use clean water to thoroughly wash the airbag. Make sure the damaged area is free from mud, sand, oil, and other debris. If submerging the entire airbag in water, do not soak it for more than 10 minutes. Let the surface dry completely before continuing.
Prepare Rubber-Coated Cord Fabric (Layered Patch)
Use cord fabric coated with raw rubber, also known as rubberized ply fabric. This should match the material and fiber angle of the original airbag. Different patching techniques are used depending on the damage type. At NANHAI, we provide matched repair materials based on customer requests.
2. Step-by-Step Ship Launching Airbags Repair Process
1. Mark Repair Area
Define the repair zone clearly, extending 20–26 cm beyond the visible damage to ensure internal or hidden damage is also covered.
2. Grind the Surface
Use a grinder to sand the damaged area until the reinforcement fiber cords are visible. Be careful not to damage the fibers.
3. Stitch for Long Tears
For long cracks, stitch the tear with cord thread. Keep each stitch hole 2–3 cm away from the crack and space stitches roughly 10 cm apart.
4. Clean the Surface
Wipe the ground area with gasoline and let it dry thoroughly.
5. Apply Rubber Cement (Glue)
Prepare rubber cement by soaking raw rubber in gasoline (weight ratio 1:5). The first layer should be slightly diluted (1:8) for better absorption. Let each layer dry before applying the next.
6. Seal the Crack
Use a raw rubber strip (1 mm thick, 1 cm wider than the crack) to cover and seal the crack.
7. Apply Another Gasoline Layer
Brush the area again with gasoline and allow it to dry.
8. Start Layering with Rubberized Cord Fabric
For vertical cracks:
- Apply the first layer perpendicular to the crack using 10 cm-wide fabric.
For horizontal cracks or small punctures, skip to step 10.
9–16. Continue Multi-Angle Layering
- Apply additional layers of rubberized fabric in the following sequence:
- Parallel to the main axis (overlap >5 cm, rounded corners)
- Diagonal 1: Fiber angle same as internal reinforcement, 1 cm wider
- Diagonal 2: Opposite angle to previous diagonal (e.g., +30° then -30°), 1 cm wider
- Final Layer: Perpendicular again, 1 cm wider
- Each layer must be brushed with gasoline and dried before applying the next.
- All patch corners should be rounded to avoid stress concentrations.
17. Press the Layers Firmly
Remove any trapped air between layers by pressing the patches with a roller or hand pressure.
18. Final Seal
Apply gasoline around the edges of the outermost layer and seal with a 1 mm-thick, 2–3 cm-wide raw rubber strip.
3. Hot Vulcanization
Use a simple setup with a steel frame, sandbags (or filled inner tubes), jacks, and heating plates to cure the patch.
- The heating plate should be approximately. 25 mm thick, 0.5 m long, and 0.4 m wide, with smooth edges.
- Maintain curing temperature at 150 ±5 °C.
- Allow slow cooling before removing pressure.
4. Inspection and Air Test
After vulcanization:
- Visually inspect for bubbles, delamination, or sponge-like texture.
- Ensure no signs of rubber aging, undercure, or overture.
- Perform an air pressure test at 1.2 times the working pressure.
Warning: If the airbag was severely damaged and then repaired, its working pressure should be reduced during future use.
5. When Not to Repair
For safety reasons, airbags should not be repaired if any of the following conditions exist:
- Over 8 years since the manufacture
- Burst due to exceeding rated pressure
- Serious damage:
- Circumferential crack longer than 1/3 of the airbag’s perimeter
- Longitudinal crack longer than 2 m
- Cross-shaped or multi-directional tearing
- Severe aging, surface cracking, sticky rubber, or rotten fiber cords
Conclusion
Repairing ship launching airbags is a precise task that requires correct materials, step-by-step operations, and temperature control. Following the proper repair guidelines helps restore the airbag’s performance and ensures safe operations during future launches. Always inspect the condition carefully and evaluate whether the repair is suitable or replacement is required.